How to Track time spent on tasks
Users can track time they spend on tasks and measure performance.
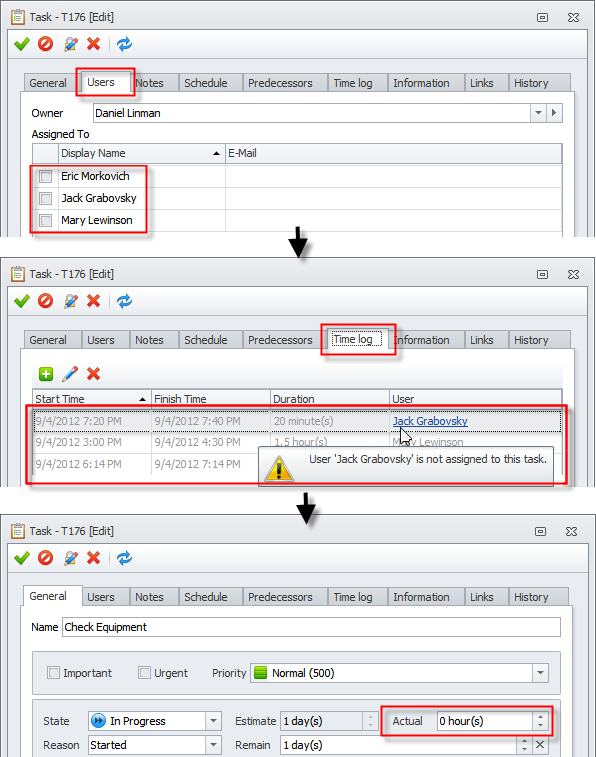
Note If users are not assigned to the task, their time log items appear as dimmed, and the time they have spent is not included to the calculation of actual duration.
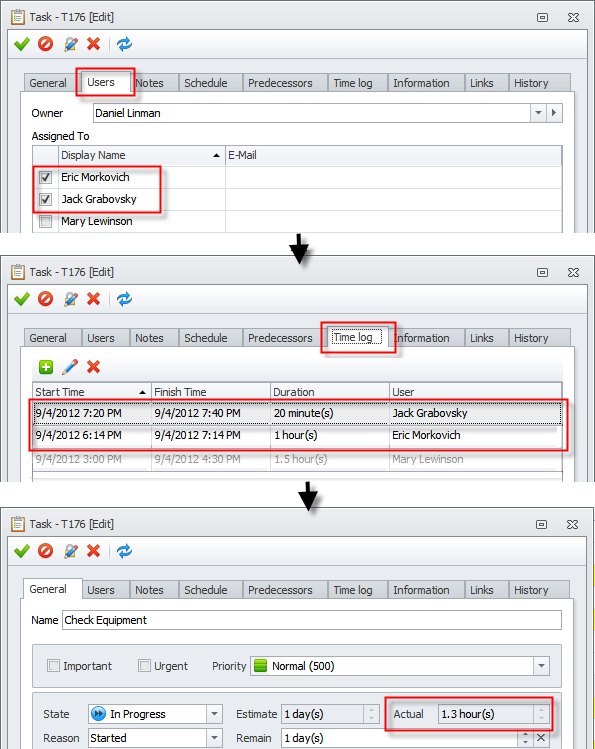
Note If users are assigned to the task, their time logs do not appear as dimmed and the time they have spent is included to the calculation of actual duration.
Automatic time tracking
You can track time automatically by using timer.
To start time tracking
- Click the task that you want to track, and then on the ribbon, in the Extended group, click Start Tracking.
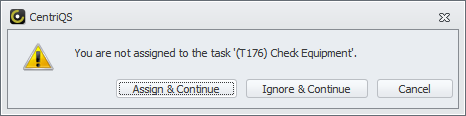
If you are not assigned to the task, but still start automatic task tracking, you get a warning message to choose one of the following options:
- Assign and Continue – you will be assigned to the task, and the time log will be included to the calculation of the actual duration.
- Ignore and Continue – you will not be assigned to the task, and the time log will be not be included to the calculation of the actual duration.
- Cancel – you will cancel the operation, and the time log will not be created.
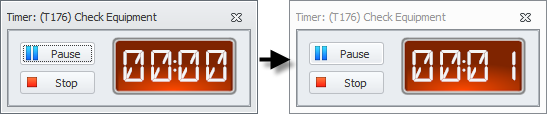
If you are assigned to the task, the task timer appears and starts counting up.
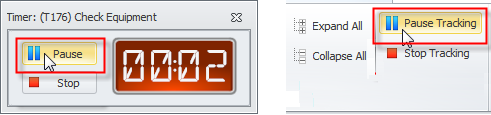
To pause time tracking
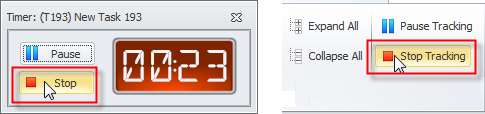
- Click Pause in the Timer window or click Pause Tracking on the ribbon, in the Extended group.
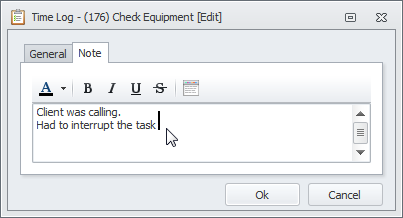
The Timer window remains on the screen, the time gets reset to 00:00, and the Time Log dialog box appears to let you add appropriate text on the Note tab.
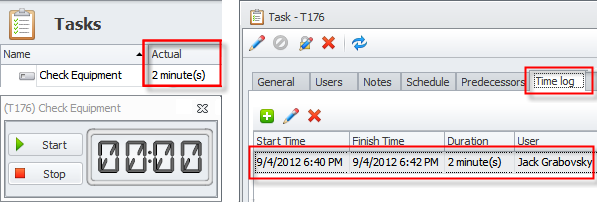
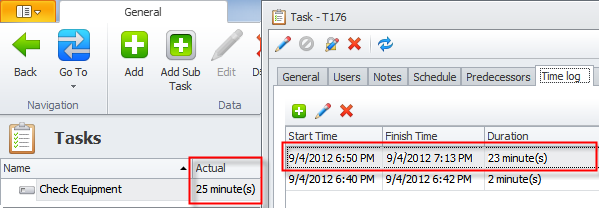
After saving the time log, actual duration appears in the Actual column of the Tasks view, and the time log appears on the Time Log tab of the Task dialog box.
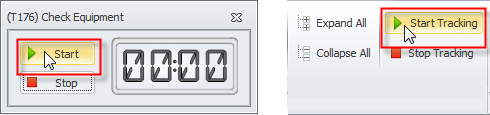
To restart time tracking
- Click Startin the Timer window or click Start Tracking on the ribbon, in the Extended group.
To stop time tracking
- Click Stop in the Timer window or click Stop Tracking on the ribbon, in the Extended group.
After saving the time log, actual duration appears in the Actual column of the Tasks view, and the time log appears on the Time Log tab of the Task dialog box.
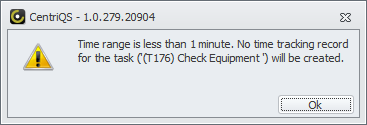
Note If you track time for less than one minute, then time log is not created and actual duration is not recorded.
By default, if there has been no input from the keyboard or mouse within 5 minutes, time tracking gets paused automatically and needs to be started again.
To change default settings
- Click Options in Application Menu, click the Time Tracking tab, and then change the time in the Delay box or clear the check box to disable this option.

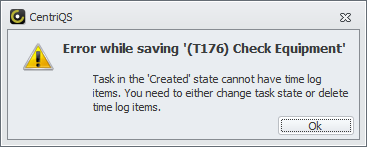
Note If a task has at least one time log, and you change its state to Created, the following message appears: "Task in state 'Created' cannot have time logs. You need to either change task state or delete time logs items".
Manual time tracking
You can track time manually by adding time logs or entering actual duration.
To add time logs
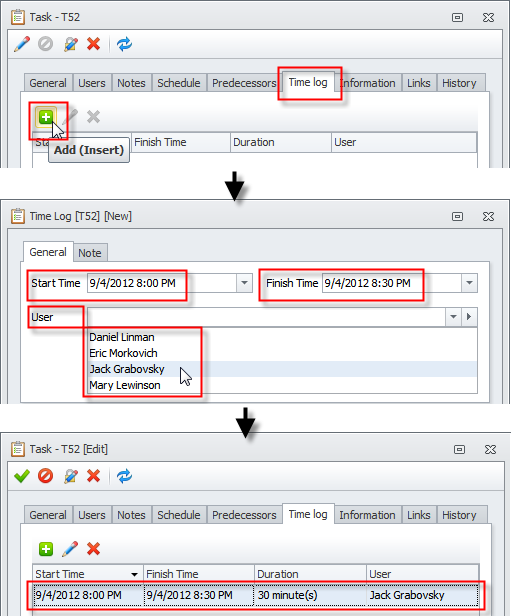
- In the Task dialog box, click the Time Log tab, and then click Add (+).
- Enter date and time in the Start Time box and the Finish Time box, and then click OK.
Note If you add the time log on behalf of another user, click required user in the User list.
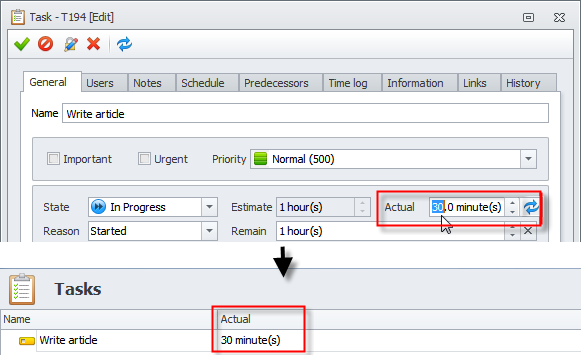
To enter actual duration
- In the Task dialog box, on the General tab, enter required value in the Actual box.

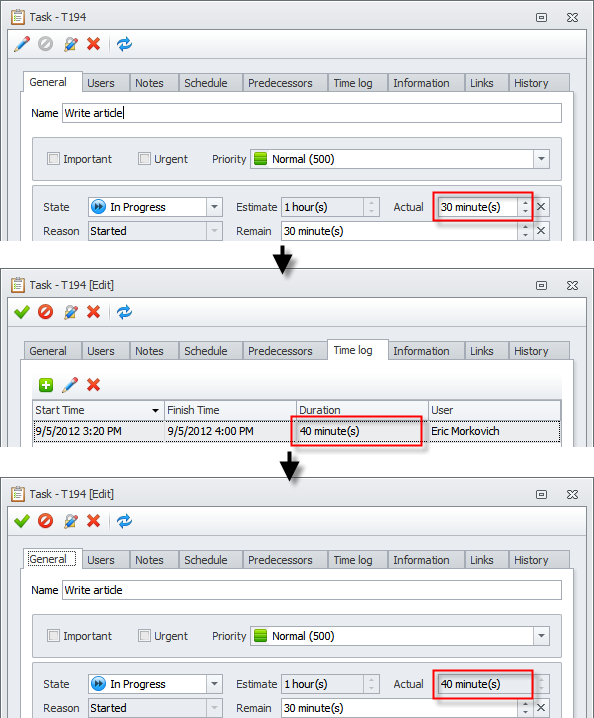
Note If you entered actual duration in the Actual box, and then you add a time log, the previously entered value in the Actual box becomes overwritten by the time log value.
Performance measuring
You can use actual duration, estimated duration, and remaining duration to measure performance.
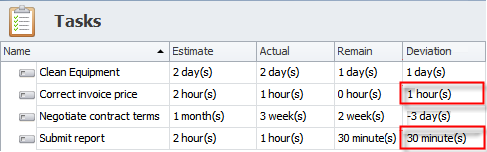
For example, if Estimate equals Actual plus Remain (or Actual equals Estimate minus Remain, or Remain equals Estimate minus Actual), then Deviation is Zero, which means that the task is both well planned and well done.

If tasks have negative values in the Deviation column, it means that these tasks is either underestimated or procrastinated.
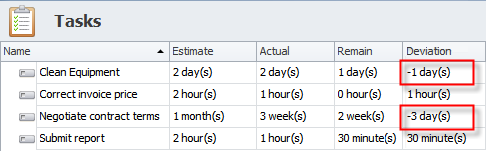
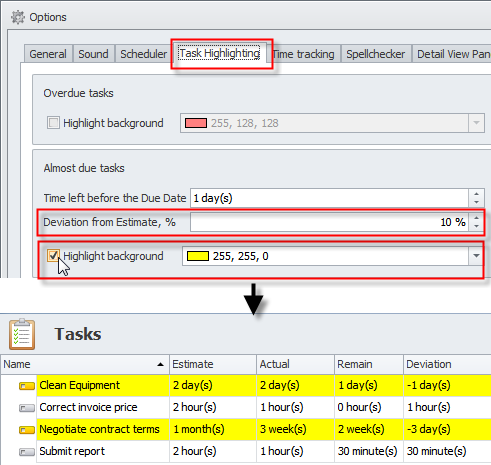
Tip Background of tasks with negative values in the Deviation column can be highlighted with a color depending on percentage of deviation.
If tasks have positive values in the Deviation column, it means that these tasks are either overestimated or done quicker for some reason.
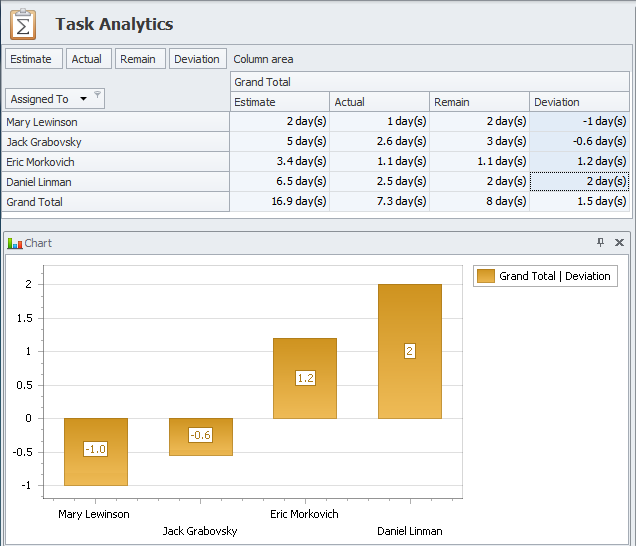
Deviation can be used as a performance measure in the Task Analytics view and the Task Analytics Chart view.
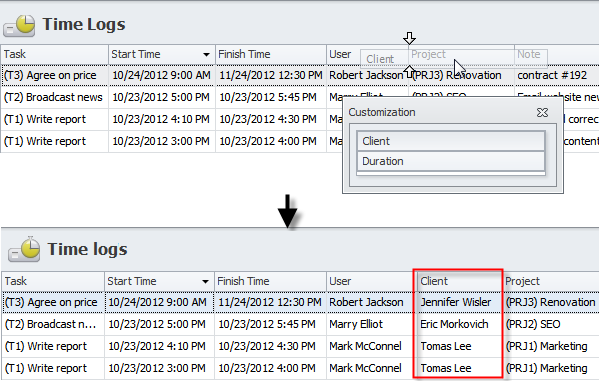
Time Logs view
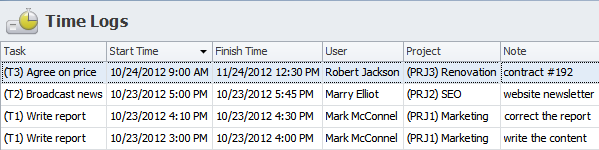
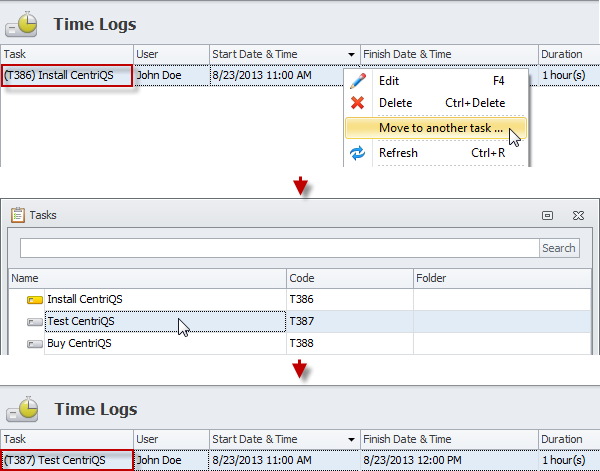
The Time Logs view displays all time log records created by users both automatically and manually.
You can move time logs from one task to another by right-clicking the time log, and then clicking Move to another task.
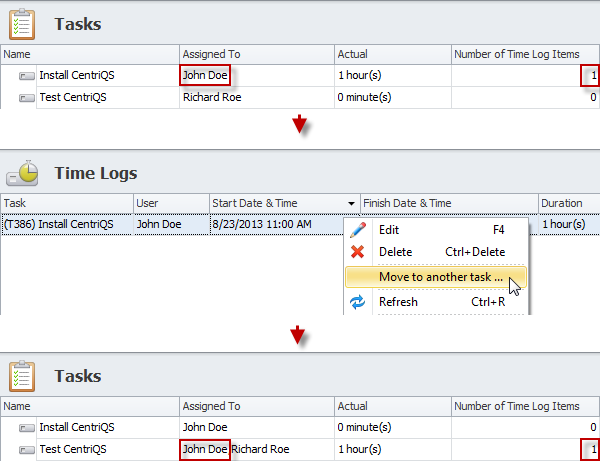
Note If time log created by one user is moved to another task assigned to another user, the time log user gets automatically assigned to another task.
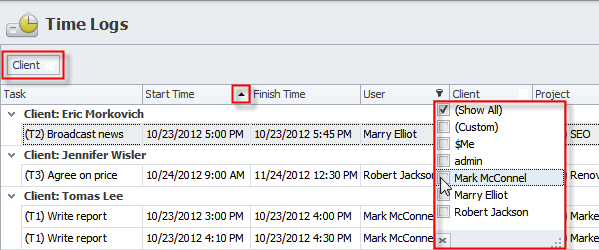
You can sort, group and filter time logs by any columns.
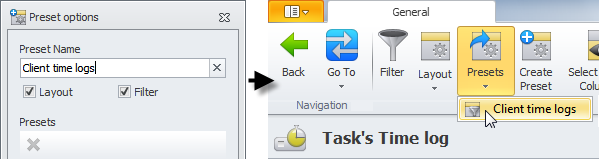
You can set the Time logs view layout and create presets.
Note Time logs have the following properties: Start Time, Finish Time, User, Note, Task, and Project. If tasks have custom properties, you can show them in the Time Logs view.
You can print and export the Time Logs view to available formats.
